Multi-Tenant Environment Management with Kubernetes Namespaces
Sharing a single Kubernetes cluster among multiple teams, projects, or customers saves costs, but without isolation, security and resource conflicts are inevitable. Namespaces provide logical partitioning; ResourceQuota, LimitRange, NetworkPolicy, and RBAC make those partitions secure and controlled
Merve Arslan
WordPress & Hosting Expert
Sharing a single Kubernetes cluster among multiple teams, projects, or customers saves costs, but without isolation, security and resource conflicts are inevitable. Namespaces provide logical partitioning; ResourceQuota, LimitRange, NetworkPolicy, and RBAC make those partitions secure and controlled. This guide walks through setting up a multi-tenant Kubernetes environment step by step.
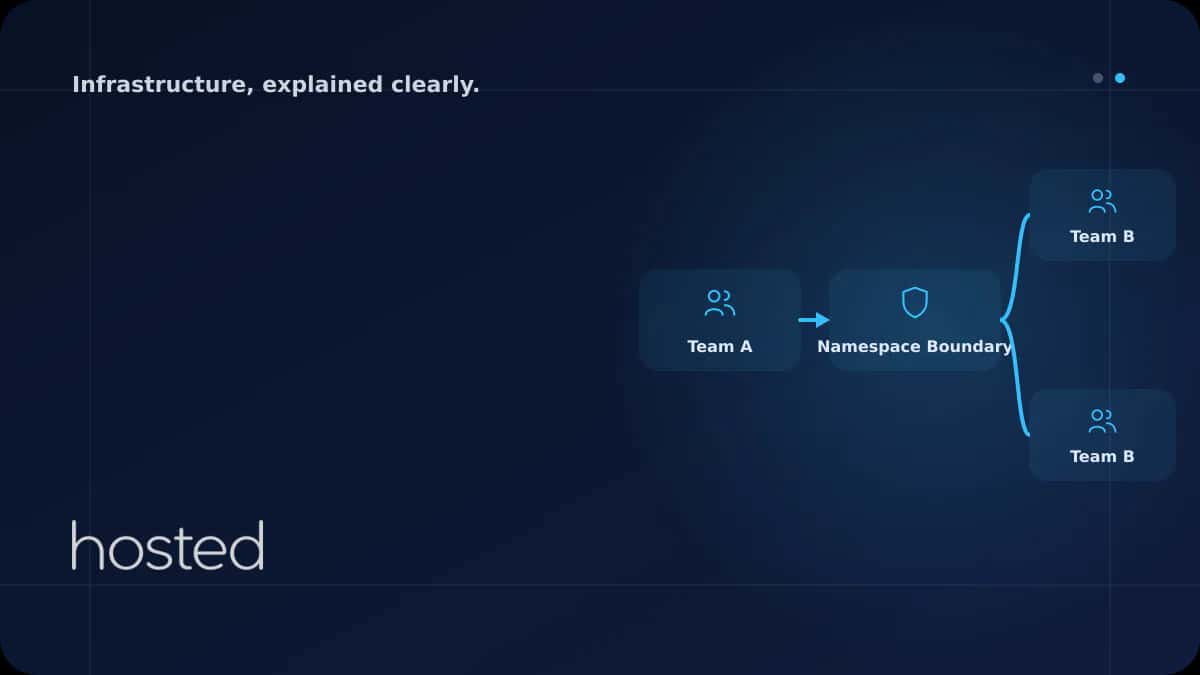
Namespace Basics
A Namespace divides cluster resources into logical groups. Each namespace has its own Pods, Services, ConfigMaps, and Secrets. Kubernetes ships with four default namespaces: default, kube-system, kube-public, and kube-node-lease.
apiVersion: v1
kind: Namespace
metadata:
  name: team-frontend
  labels:
    team: frontend
    environment: production
---
apiVersion: v1
kind: Namespace
metadata:
  name: team-backend
  labels:
    team: backend
    environment: production
Resource Limiting with ResourceQuota
ResourceQuota limits the total CPU, memory, and object count a namespace can consume. It prevents one team from exhausting cluster resources and impacting others.
apiVersion: v1
kind: ResourceQuota
metadata:
  name: team-frontend-quota
  namespace: team-frontend
spec:
  hard:
    requests.cpu: "8"
    requests.memory: 16Gi
    limits.cpu: "16"
    limits.memory: 32Gi
    pods: "50"
    services: "20"
    persistentvolumeclaims: "10"
Network Isolation with NetworkPolicy
By default, all namespaces can communicate with each other. NetworkPolicy restricts cross-namespace traffic to achieve real isolation.
# Allow traffic only from same namespace
apiVersion: networking.k8s.io/v1
kind: NetworkPolicy
metadata:
  name: deny-cross-namespace
  namespace: team-frontend
spec:
  podSelector: {}
  policyTypes:
  - Ingress
  ingress:
  - from:
    - namespaceSelector:
        matchLabels:
          team: frontend
⚠️ Important: NetworkPolicy requires a CNI plugin that supports it, such as Calico, Cilium, or Weave. Flannel does not support NetworkPolicy by default.
Access Control with RBAC
Role and RoleBinding ensure each team can only access resources within their own namespace.
apiVersion: rbac.authorization.k8s.io/v1
kind: Role
metadata:
  name: developer
  namespace: team-frontend
rules:
- apiGroups: ["", "apps"]
  resources: ["pods", "deployments", "services", "configmaps"]
  verbs: ["get", "list", "watch", "create", "update", "delete"]
- apiGroups: [""]
  resources: ["secrets"]
  verbs: ["get", "list"]
---
apiVersion: rbac.authorization.k8s.io/v1
kind: RoleBinding
metadata:
  name: frontend-developers
  namespace: team-frontend
subjects:
- kind: Group
  name: frontend-team
  apiGroup: rbac.authorization.k8s.io
roleRef:
  kind: Role
  name: developer
  apiGroup: rbac.authorization.k8s.io
For Kubernetes fundamentals, check our Introduction to Kubernetes guide. For auto-scaling, see our HPA guide. For network security, read our Zero Trust guide. The Kubernetes multi-tenancy documentation and ResourceQuota guide are valuable additional resources.
Frequently Asked Questions
Do Namespaces provide real isolation?
Namespaces alone provide only logical separation. Real isolation requires ResourceQuota, LimitRange, NetworkPolicy, and RBAC applied together. For full isolation, consider separate clusters or virtual cluster solutions like vCluster.
How many Namespaces should I create?
One namespace per team or project is a common approach. Environment-based separation (dev/staging/prod) can also be added. Too many namespaces create management complexity; 10-50 is sufficient for most organizations.
How do services communicate across Namespaces?
Services in different namespaces are accessible via the service-name.namespace.svc.cluster.local DNS address. Use NetworkPolicy to control which namespaces can communicate.
What happens when ResourceQuota is exceeded?
When quota is exceeded, new Pod creation requests are rejected. Existing Pods are not affected. Monitor quota usage with kubectl describe quota -n namespace and increase as needed.
Conclusion
Building a multi-tenant Kubernetes environment starts with logical separation via Namespaces, then adds resource limiting with ResourceQuota, network isolation with NetworkPolicy, and access control with RBAC. Apply all layers together to create a secure and controlled shared cluster environment.
Multi-Tenant Kubernetes Infrastructure
Build your secure and isolated Kubernetes environment on Hosted Cloud servers.
Explore Cloud Server Plans →Merve Arslan
WordPress & Hosting Expert
Creating guide content on WordPress performance optimization, hosting selection, and e-commerce infrastructure.
Comments coming soon